How to build a rocket workshop (part 8: judgment day)

I alluded to the fact in the last two posts that there are some laws and regulations applicable to electrical work.

Among other things, your city or state will require you to obtain a permit (and pay a fee) before you can even begin the work. In Washington state, this is the Department of Labor & Industries. The work needs to be done in accordance with certain requirements, and then an inspection is required once it’s complete. At that point, you notify the Department and schedule a date, and an electrical inspector will come on site to review all of the work.

It’s not uncommon to fail an inspection and for remedial action to be required. An inspector can fail you no matter how small the violation, relative to the overall work done.

Judge not, lest ye be judged – amirite? Unfortunately, it’s literally the inspector’s job to judge – and he or she has significant power and discretion.

front of shed with door and new exterior light
purely cosmetic

What are the requirements governing electrical work? There are several, and they are no joke. I had to bring myself up to speed quickly.

First, there’s the National Electrical Code (“NEC”), which is published by the National Fire Protection Association (“NFPA”), in NFPA 70. Interestingly, this is the same NFPA that publishes the Code for High Power Rocketry (“HPR”), in NFPA 1127. But that’s a whole separate topic, worthy of its own blog post.

The NEC is “national” but is not technically a federal law. However, it has been adopted in all 50 states, which can also modify it as they see fit – so the rules can and do slightly vary from one region to another.

In Washington, there are state-specific statutes and regulations further modifying the standard NEC rules.

view of electrical panel in shed
where the magic happens

So what are these rules, exactly? There are far too many for a comprehensive list, but here are a few examples:

  • Conduit minimum depth underground. Copper wire must generally be enclosed inside conduit (metal/rigid or PVC) and, if horizontal and running across the ground, must be buried so the top of the conduit is at least 18″ underground.
  • Securing conduit. Conduit that is vertical and runs along walls (indoor or outdoor) must be secured with straps (plastic or metal) at no greater than 36″ intervals.
  • Conduit bends. You can physically bend conduit – with heat, if it’s PVC, for example – or you can attach 90 degree (or 45 degree) PVC “elbows” for turns. But the total turns cannot exceed 360 degrees. That means, for example, you could have a maximum of four 90 degree “elbows” or PVC pipe bends.
  • Panel clearance. Installation of a new electrical panel or sub-panel must have a certain minimum amount of clearance in front of it. Specifically, a minimum width of 30″, depth of 36″, and height of 60″. Visualize a telephone booth-like invisible box in front of the panel that must be completely unobstructed to ensure access to the panel.
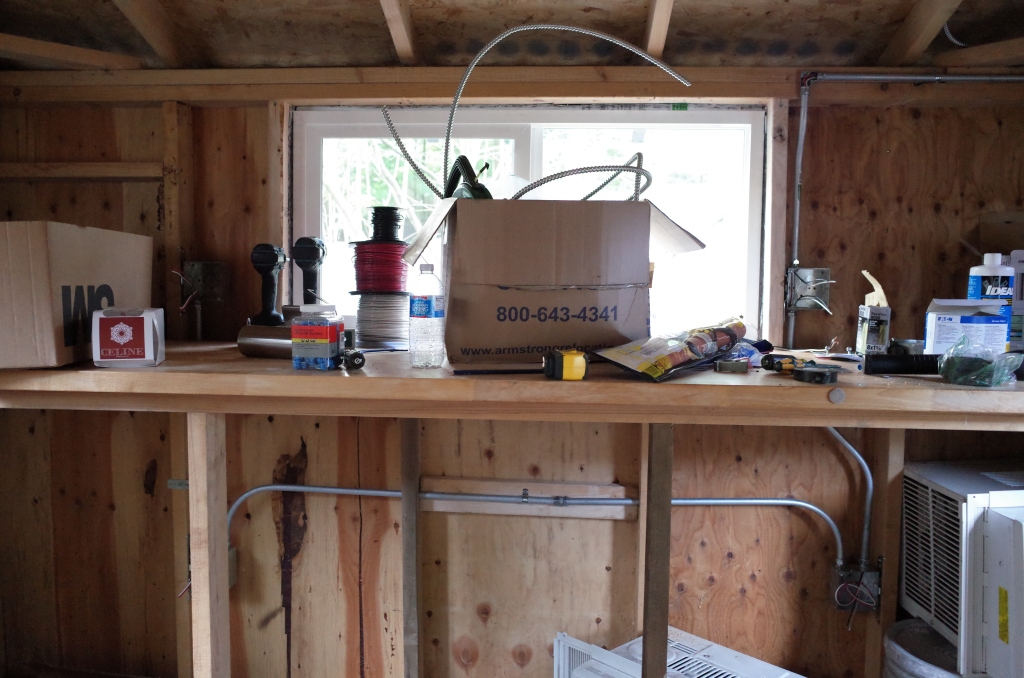
  • Tamper-proof outlets. Electrical outlets (or “receptacles”) inside a dwelling unit (e.g. a house) must be tamper-proof. Inside a shed, which is not a dwelling unit, they don’t need to be – until the 2020 version of the NEC takes effect this summer, at which point even the shed would need all outlets to be tamper-proof.
  • GFCI outlets. For safety reasons, a ground fault circuit interrupter (“GFCI”) is required. Either the electrical panel needs to have a GFCI circuit breaker, or at least one outlet needs to be a GFCI outlet.
  • Ground rods. The new electrical panel for the shed requires at least one copper ground rod, and depending on the soil quality (specifically, its electrical resistance), possibly requires two. A ground rod comes in a standard length of 8 feet and has to be driven completely down into the ground. A bare copper wire (not insulated or inside conduit) connects the ground rod to the electrical panel. This is again for safety reasons, to redirect excess current.
close up view of junction box with outlets
junction box/ outlets

The NEC and its state and local variations of the electrical code have many more rules that must be followed. The above list is just a small fraction of things I learned during the course of this project – all from my friend Darrin, noted electrical expert and lifelong student of the electrical code, among other titles.

Again, the reasons for these rules are often pretty self-explanatory. Clearance in front of a panel is important so that a person has unobstructed access to the panel. Copper wire should be inside conduit when buried, in order to protect it from future damage – and that conduit should be buried pretty deep, for the same reason. The rules are mostly about safety and common sense.

As soon as we completed all the work, I scheduled the inspection. This was on a Sunday afternoon, incidentally, and the inspector showed up first thing Monday morning – record response time.

Judgment day!

The inspector was friendly, and he seemed quite impressed with all the work and how thoroughly it was done. He agreed it met all the applicable requirements in the code, with just a couple of very minor issues to address. These were promptly fixed, and the project officially passed inspection.

All I need to do now is a bit of final cleanup work – fill in that huge trench; clean up the mess everywhere from sawing, drilling; get the landscaping back in order with about a hundred wheelbarrows of mulch; and so on.

I think at this point, the backyard garden shed can officially and rightfully be called a workshop.

How to build a rocket workshop (part 7: the burial)

Step #2,352: dig a trench.

In order to run electrical wire and conduit from the main electrical panel in the house out to the shed, the electrical code requires (more on this later) that the conduit be buried a minimum of 18 inches underground.

digging completed – view from above

This requirement is totally understandable, given the nature of electricity and the danger of someone accidentally digging into it. It is also burdensome. It fact, is much more burdensome than it seems. This is partly because 18 inches is deeper than it initially sounds, and the difficulty increases exponentially as you get further down. If you’ve ever done any digging in your yard, even just to replant a small plant or bush, I’m sure this will resonate with you.

The minimum depth applies to the top of the PVC conduit, and you need to err on the side of too deep rather than too shallow if you want to make sure it’s up to code and will pass an inspection, so the trench really needs to be about 20 inches deep.

But the most difficult problem you immediately run into – if you’re me – is the soil quality. This is soil that nobody has touched in many decades. It’s dense and compressed, like clay, and also rocky. I mean extraordinarily rocky. There were points during which I achieved maximum rock, i.e., there was no soil at all and just pure rock.

pile of large rocks and stones, with a Starbucks cup for scale
sample of large rocks I dug up, with cup for scale

I had nothing other than a simple garden shovel. I went out on a limb and halfway through the project bought something that is specifically made for digging trenches, which looks just like the shovel except it’s somewhat narrower. This was helpful, but the digging was still brutal.

I’d estimate digging this trench by hand took about 50 percent of the total time for this electrical project, with the other half being everything from drilling and cutting and bending conduit to actually running the copper wire inside it and installing outlets and light fixtures (for which, as mentioned in the last post, my friend Darrin was invaluable and did all the heavy lifting, literally and figuratively). In retrospect, maybe I should have brought in some kind of heavy machinery to dig this trench.

Did I mention the sheer quantity of rock?

another large pile of rocks
maximum rock

Anyway, the trench was simple enough, conceptually. And from the main electrical panel in the house to the shed, only about half had to be underground. The other half is above ground and runs along the outside of the house.

Below is a picture of the trench mid-project, when I was busy naively underestimating the 20 inch depth requirement. It’s getting there, but by no means complete yet. You can see where the conduit comes up out of the trench, above ground, in between the door and the gutter downspout. We also installed a new junction box with electrical outlets and weatherproof cover there, just because we could.

View of L-shaped trench dug in ground, surrounded by piles of dirt and stones
a straightforward trench

Below is the view underneath the front of the shed, where the 1″ diameter conduit goes up inside the shed to a sub-panel. The smaller 1/2″ conduit on the left here contains copper wire, running from the shed’s sub-panel to the copper ground rod that you can see here.

As an interesting aside: with any electrical panel, you need to have at least one copper ground rod, and this comes in a standard length of 8 feet. The metal rod must be buried underground and attached via copper wire to the panel. In other words, you have to drive the rod straight down into the ground.

If the soil quality is good and its resistance is low enough, you may be able to get away with just a single 8′ ground rod. In our case, the soil was abysmal, and we needed to drive two separate 8′ copper rods into the ground. You’ll never be required to use more than two rods.

Outside shed, close up view of pvc conduit in trench and copper grounding rod
pvc conduit and copper grounding rod

Here are two final pictures of the trench once it was dug further down to the required minimum depth, and we laid the conduit inside.

view of trench from house, with PVC pipe laid in trench
trench from house

As this project went on, we needed to leap across increasingly wide and deep trenches, countless times. Particularly awkward was the trench needed to pass directly in front of the shed door, which required Olympic-level gymnastics to vault across the ditch but also simultaneously duck your head to avoid hitting the top of the door frame.

Eventually we realized it would just be easier to throw together a few wooden bridges made from lumber (2x4s or 2x6s). This prevented more injuries and also was a good idea for the inspector who still needed to come on-site after all the work was complete.

view of trench continuing to shed, with PVC pipe
trench continues to shed

If you look closely (and maybe squint), you can also see in a few of these pictures that we came across some unexpected pipes and drain tiles. We called 811 before digging – required by law – and the various utility companies came out to ensure there was nothing buried underground in this area.

But there were drain tiles, which are not part of any utility but are just part of the property. These were loosely connected and immersed entirely in tons of rock, to facilitate water drainage from the house, and we hit them in two separate locations as they cut across the trench. We also encountered some other pipe (about the same size as the drain tiles, roughly 4 inches in diameter) whose origin and purpose were unclear. We just dug around and beneath it, without disturbing it, and continued on our way. That pipe remains shrouded in mystery.

The conclusion here is simple and painfully obvious: digging sucks. But it was a necessary step to bury the copper wire and conduit in order to comply with the electrical code. This was the most backbreaking part of the project but also allowed for the more fun electrical wiring to be completed in the shed (covered in the last post).

How to build a rocket workshop (part 6: the electrocution)

It’s taken a while to provide an update on the workshop because… this step was a significant amount of work.

I enlisted some serious help from my friend Darrin, who has a background in electrical engineering, prior experience doing electrical installations, and an immense collection of power tools and equipment.

Copper wire, in red, white, black, and green
copper wire

The short version is this: we ran some electrical wiring from the house’s main electrical panel to the shed, burying it underground, and put a new panel inside the shed. From there, we installed a bunch of junction boxes with outlets, two light switches, and even an exterior light (just for fun), all connected to the shed’s panel. It’s done, and the shed has indoor and outdoor lights, and a ton of working outlets (soon to be put to good use).

The long version, if you care to read it, is below.

First, a few preliminary thoughts (from someone who has no background in electrical work) and the basics.

Conceptually, this project required a couple of steps:

  • adding a few new circuit breakers to the house’s main electrical panel;
  • running copper wires inside conduit along the outside of the house and then underground;
  • digging a trench;
  • installing a smaller sub-panel inside the shed, and adding circuit breakers to it;
  • connecting the wire/ conduit to the sub-panel inside the shed;
  • installing copper wire inside conduit, inside the shed;
  • installing metal junction boxes and electrical outlets in various places; and
  • adding an outside light fixture and wiring it up.

Here’s a list of the major supplies we used:

  • roughly 80 feet of pvc conduit (1 inch diameter), connecting house main electrical panel to shed’s sub-panel; along with a few 90 degree “elbows”;
  • roughly 20 feet of metal conduit;
  • roughly 20 feet of metal clad (“MC”) cable;
  • plastic and metal straps to secure the conduit to the house wall or shed wall;
  • metal junction boxes;
  • electrical panel for the shed;
  • circuit breakers for main house panel;
  • copper wire (black, white, red, and green), to connect everything inside shed as well as connecting shed to main house panel;
  • outlets or “receptacles” for the junction boxes (3 GFCI outlets, plus other regular outlets);
  • wall plates;
  • two copper grounding rods (each 8 ft in length) and acorn nuts;
  • roughly 20 feet of bare copper wire to connect both grounding rods to shed’s panel; and
  • external light fixture and mounting hardware,

I am very possibly forgetting a few things. As I mentioned above, this was a big project.

It also required a lot of different tools, some of which I didn’t know existed. We used basic tools like drills and circular saws, screwdrivers and mallets, measuring tape and a level, etc., of course. There were also giant drills with giant drill bits to punch huge holes through concrete or cinderblock; and a giant hammer attachment for this drill to drive an 8 foot long metal rod straight down into very rocky soil. We also used tools to cut (and to bend) metal conduit, and to cut (and bend) PVC conduit. As with every part of this project, I have to give full credit to Darrin. My role was participatory at best.

I’m going to create a completely separate post for the outside work – i.e., digging the trench and laying the conduit running from the house. But below are some pictures of the work inside the shed. First, the electrical panel, light switch, and conduit during the installation:

Inside shed front wall - electrical panel, conduit, and light switch
inside the shed – electrical panel, conduit, and light switch

And after completion:

electrical panel inside shed
completed panel

Likewise, here’s a bit of a closer view of the panel and light switch, during and after the install:

Close-up view of electrical panel and box for future light switches
close-up view of panel and box for future light switches
electrical panel and light switch - closer view
panel and light switch complete

The side wall now has 4 junction boxes with outlets (2 above the bench and 2 below), with a 5th box on the ceiling for light fixtures. Below are pictures of the side wall during and after this work was completed.

View of side wall inside shed, with more conduit and junction boxes for future outlets
more conduit and junction boxes for future outlets
view of side wall in shed, with metal conduit and new outlets
conduit, outlets installed
corner view between side and front wall, with ceiling outlet for light fixture
corner with ceiling outlet for light fixture
new outlet, in metal box with metal conduit
new outlet

As mentioned above, I’ll create at least one separate post about the work done outside – digging the trench, and connecting the shed to the house panel with conduit – and probably several separate articles. What I learned about the local electrical code and its many requirements, for example, could easily fill volumes (though it would likely interest nobody). In any event, this post is long enough as it is, and I’ll wrap it up for now. Stay tuned!

What to do in Maui

As mentioned in my last post, we recently got away for a week in Hawaii. What a trip!

pool surrounded by tropical plants and palm trees
resort life

This is a bit of a break from rocket activity, but it’s not totally unrelated – I did finish reading an excellent biography of Wernher von Braun during the flight, and I plan to write a couple of posts about that in the near future as well. And if nothing else, I needed an excuse to post a few pictures.

The Pacific Northwest is beautiful, but it can be pretty gloomy in the winter months – lots of darkness and clouds, with very little sun. This winter was particularly cloudy. Imagine day after day, week after week, with full cloud coverage, and virtually no sun. Relentless!

Luckily, Hawaii is not terribly far from Seattle: it’s just about a five hour flight. We’d never been to any of the islands before, and we decided on Maui.

The trip was a welcome relief from the despair of Seattle’s winter, and also a respite from the endless news coverage about the coronavirus throughout the country, particularly in Washington state. (See previous post.)

Below is a summary of our week’s activities in Maui, and of course, a couple of pictures.

road curving around a mountain in a tropical forest
road to hana

Itinerary highlights!

Sunday – flight from Seattle to Maui

Monday – beach day at Kaanapali beach, dinner at Star Noodle in Lahaina

Tuesday – Drove the Road to Hana, and toured Ono Fruit Farm; dinner at Da Kitchen

Wednesday – breakfast at The Gazebo, explored Lahaina and Kihei and spent more time on the beach

Thursday – visited Ali’i Kula Lavender Farm and drove to summit in Haleakala National Park

Friday – Whale watching and snorkeling on Pride of Maui boat tour, and then beach in Wailea

Saturday – Kanaha beach, dinner at Mama’s Fish House in Paia

Sunday – lunch at the Fish Market Maui (fish tacos!) in Lahaina, and flight home to Seattle

beach sunset
beach sunset at kaanapali

We stayed at an airbnb in Lahaina, which was amazing. And of course, the trip was definitely punctuated by multiple trips to Costco (the only one on the island) to stock up on food and supplies, and for filling the gas tank.

Note: prices are even higher in Hawaii than they are in Seattle, and that’s saying something. But as you can see from the itinerary above, we really packed in a full week of adventure and also relaxation.

Below are a few final pictures (and, as always, check out my instagram if you want to see more).

view of haleakala crater from the summit, obscured by clouds
haleakala summit
another beach sunset
black sand beach with palm trees
black sand beach on the road to hana

Sometimes you have to take a break from building and launching rockets, if only to rest and recharge, and then get back at it!

Seattle, the coronavirus capital of the US

You can’t go anywhere without hearing people talk about the coronavirus (COVID-19) lately. I mean, anywhere. Go for a jog or walk outside, and as you pass other people who are talking, more often than not their conversation is about coronavirus. Same with fellow diners in a restaurant, or co-workers in the office – if you’re still going into the office, that is, and not yet working remotely.

coronavirus
coronavirus

Airlines are reassuring passengers that they are taking appropriate safety measures to ensure that travelers are safe. The stock market is tanking, in part because of the economic harm caused by the virus (or by concern or panic about the virus).

I live in the Seattle area, and closer to home, the situation is a bit surreal. I read a recent New York Times article that prompted me to write something about this. Sure, this is generally a blog about building and launching rockets, but even that is impacted by the coronavirus epidemic and news coverage.

Amazon Spheres, downtown Seattle

As the New York Times article notes, Seattle is something like the epicenter for this virus in the United States. The first death from COVID-19 in the US was in Washington state, in King County (which is Seattle and some neighboring areas). As of today – March 10 – the Washington Department of Health is reporting a total of 267 COVID-19 cases and 25 deaths across the state. Alaska Airlines, based out of Seattle, is one of many airlines offering no change or cancellation fees for flights scheduled through certain dates. Amazon and Microsoft, whose headquarters are in the Seattle area, have recommended their employees in the area work from home. Facebook (which has a large Seattle office) has said the same thing.

State and local governments in Washington have also advised people to avoid large public crowded spaces or events. In fact, the governor of Washington has declared a state of emergency, as have several other states across the country, and is banning crowds of 250 or more people.

With respect to rocketry and related activities, some local rocketry clubs have either cancelled launches or warned that people not attend. Similarly, the Lake Washington Ham Radio Club, where I got my amateur license a couple months ago, cancelled its monthly meeting due to the outbreak.

What can be done in this situation except escape Seattle for the remote beaches of Hawaii? That’s exactly what we did last week, and in another post I’ll share just a quick overview of what we did (and, of course, some pictures)!

Rocket ground testing for electronics bay

After a long self-taught (and frequently confused) journey involving assembling this rocket, and building the electronics bay, I just needed to track down some black powder, set up my ground station, and conduct a bit of testing. Basically, the idea here is that the e-bay (roughly in the middle of this rocket) has a flight computer on the inside and a black powder charge on the outside, and I can remotely detonate it, causing a small but controlled explosion that will separate the rocket and deploy the parachute.

The black powder was surprisingly difficult to find. The Seattle metro area certainly has no shortage of gun shops, but virtually none of them actually sell black powder. I called more than a dozen shops at increasingly far distances from the city limits in all directions, but it seemed like nobody sold it. Everyone pointed me to other shops.

Finally, I located a place about an hour’s drive away, and after they confirmed they had some in stock, I made the trip. The specific type of black powder I was looking for was FFFF.

Rocket on wooden stands in yard, ready for ground test
all systems go

Like Jason in ancient Greek mythology returning with the golden fleece, I completed the epic journey, explosives in hand.

When it comes to the rocket separation charges, you want to use an amount of black powder that is sufficient to separate the rocket with some real verve, but also not so much you damage or destroy the rocket. Based on an online calculator, I started with 0.5g or approximately 1/8 teaspoon of black powder. This was the lower end of the estimated range (roughly between 0.5g and 1.0g) but it’s generally a good idea to start with less, test, and work your way up.

Rocket on wooden stands in yard, ready for ground test (different angle)
ready!

How do you actually pack the black powder after measuring it out? It goes into the appropriate container attached to the outside of your e-bay (on mine, a small PVC pipe end cap. But the real explosive force happens when the powder is packed tightly and confined to a small, totally sealed area.

This requires adding some “wadding” in the PVC end cap, and then covering the opening completely with tape. Any kind of tape will do the job – masking, electrical, etc. Again, the idea is to ensure the black powder is tightly packed and stays that way, and remains sealed off.

Having prepared this, I readied the rocket by putting the e-bay inside and then activating or arming the flight computer. I also have a “ground station” that can communicate with (and control) the flight computer remotely, consisting of a small handheld Yagi Arrow antenna, a TeleBT (dongle that connects to the antenna), and laptop using Altus Metrum software.

Using the software on the laptop, I armed the flight computer’s pyro charge and the countdown began. 3… 2… 1… fire!

Rocket on the grass after separation charge
post separation charge

The ground test worked and the rocket separated perfectly. My conclusions? I’m going to do more testing and will increase the amount of powder – gradually – to the high end of the range to see what works best.

I also need a sturdier structure to hold the rocket in place. I’m just using some makeshift wood supports I quickly threw together.

But the exciting thing is that it worked – with the push of a button on a laptop, I remotely activated the separation charge. The rocket separated, and the parachute deployed.

Dual deployment, here I come!